Guide
Installing Derpfest on Pixel 6 and 6 Pro
@kadm0s - 03/09/22
What is this?
A detailed guide on how to install Derpfest on the Pixel 6 Series (6/6Pro). This mostly pertains to Windows but the instructions are almost identical when using Mac or Linux. These steps will help prepare your phone for flashing this custom Android Fork. Derpfest dev includes important information in the installation notes on what Android version the phone requires prior to flashing (this will change with every release). Follow these steps to create a "clean slate" (wipe & force flash stock then flash Derp).
Your device will be wiped.
Quick Notes
- Things change rapidly. If you have any questions, check the Pixel6Chat channel for more up to date information.
- Instructions for updating or a "dirty flash" are at the bottom of page. OTA's are not working at this time (but could change in the future, see TG room). (thanks do DarkPlayer for the idea to make this guide).
Requirements:
- A computer or laptop with a chromium based browser, such as Chrome, Edge, Brave etc.
- Supported Models for Derpfest Raviole: Pixel 6 Pro (Raven) and 6 (Oriole)
- Latest platform-tools (fastboot tool) and Google USB driver (windows only). If you do not have the latest platform-tools installed, you will get errors when you try to flash. If you've previously installed the "minimal adb" tool, it is very important to uninstall/remove this tool and the folder location with files.
- Instructions for installing latest platform-tools and win usb driver are found here (by DarkPlayer):
- Make sure the battery on your phone is at least 60% charged and if you are using a laptop, connect it to a power source so the flash process doesn't fail.
Instructions for flashing Stock Android:|
(Preparing your phone before flashing)
-
Before flashing Derpfest, your Pixel 6/6 Pro latest version of Stock Android (check dev's notes).
OEM Unlocking must be enabled in Developer Options before you proceed. Enable Developer Options and toggle on OEM Unlocking (more info here). -
Click on this link which will take you directly to the Android Flash Tool Back-To-Public. It will automaticall install the latest stable Android build for your device (read dev's notes if this changes).
-
When the Flash Tool website loads, make sure to disable any adblockers and popup blocker (such as uBlock and Brave's adblocker, including disbling popup blocker and private/incognito mode). This tool won't work without these changes.
-
Turn your phone off, and without a cable connected, boot into Fastboot Mode by holding Power and Volume Down. Connect phone to the computer (that you've installed usb driver and latest platform-tools on).
-
Back on your computer browser, you will see the Android Flash Tool from step 3. Refresh the website so the Android Flash Tool loads. A new window will appear called Grant access to ADB keys
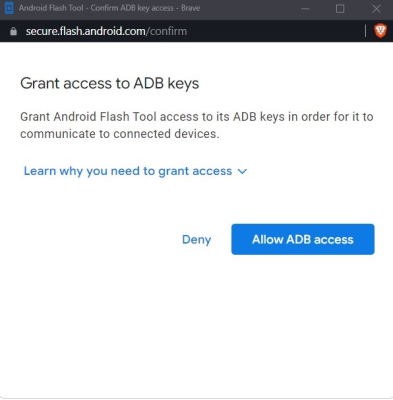
click “Allow ADB access” - if this window doesn't appear, disable popup blocker in the address bar and refresh the page -
Click +Add New Device at the bottom and highlight device then hit connect and a new black "adb" connect window will appear - highlight device and hit "connect"
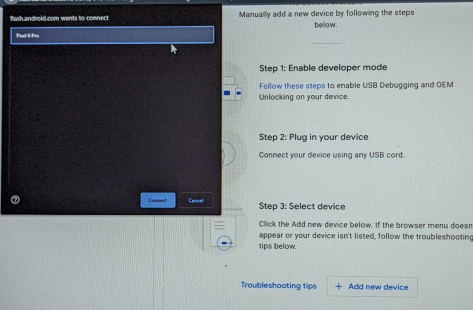
Click on your device and hit “connect”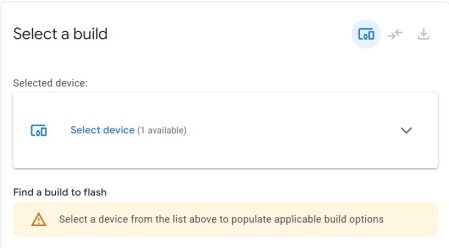
Click the arrow down and select your pixel in the "selected device" section
-
The "Select a build" window should look like this:
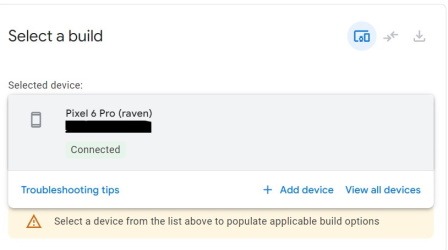
select your phone in the "selected device" window
-
Check the boxes only for “Wipe Device” and “Force Flash All Partitions” - uncheck all other options
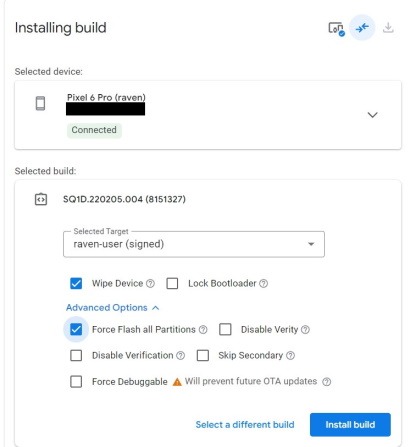
wipe device + force flash all partitions then click install build...
-
Click on “Install Build” and do not touch your browser or computer until it completes. Your phone will restart a few times. Be Patient and do Not Touch Your Phone, even when you see the “Fastbootd” menu with some new options – leave your phone alone. The phone needs to start back into Android at least once (do not setup your phone or login to google - turn phone off and go back to fastboot mode). This process takes between 8 and 45 minutes depending on your internet and usb connection speeds. The Pixel will now be on the latest stable version of Android.
Installing Derpfest Raviole:
-
Download the Derpfest zip file for your specific device. The download link will be "pinned" at the top of the Pixel6Chat and/or Derpfest TG Rooms
[sample filename of a Derpfest image: derp_raven_v11.zip]
Warning: Flashing the wrong image can cause a "bricked" device. Check the filename matches the "Device Name" listed in fastboot mode (when powering phone while holding vol-dwn + pwr). Do not extract the zip file. -
Turn your phone off, unplug usb cable and boot up into Fastboot Mode (like you did above). Then plug your phone into your computer.
-
Open Windows Explorer and locate the Derpfest zip file you downloaded and do not open it. In the address bar erase everything and type in cmd and hit enter. This will open a command prompt window in the same folder as the Derpfest image.
-
Type the command fastboot --version to check version of Fastboot (v32). This will change every few months so be sure to get the latest version from the Android Developer Page
Type command fastboot devices (this will list your serial# for your phone. the command fastboot reboot bootloader will quickly restart your phone and is an excellent way to make sure fastboot and the usb driver is installed on your computer. -
Now type in the command fastboot -w and hit enter (this will perform a quick wipe. Errors are normal. This is wipe command is not required when updating Derpfest (dirty flash).
-
Last step is to flash Derpfest. The flash command is simple:
fastboot update [and hit enter]
*For example, on Raven, the command might be:
fastboot update derp_raven_v15.zip
and on Oriole: fastboot update derp_oriole_v3.zip
Let the flash process complete without interruption. Phone will restart into fastbootd mode - Do not touch your phone or computer. You will know the flash has completed when you see the Android Boot Animation (this is normal) and then the Android Setup Wizard
The Derpfest flash procedure is complete and you can now experience Derpfest Raviole.
Notes and Recommendations:
During the Android setup wizard, it is recommended to uncheck "Device Settings" and any Google Service Apps such as sounds, wallpapers, settings, pixel launcher etc. This will ensure that there no restored data corrupted your setup. Flash process takes about 10 minutes. Check the command window for any errors or issues and if you experience any problems, post the screenshot in the Derpfest room.
Updating Derpfest (dirty flash):
-
Currently, the only way to update Derpfest is to fastboot update the latest Derpfest image through fastboot (ota updates do not currently work but this could change). This is called "dirty flash" and will update your Derpfest without needing to wipe data or go back to stock.
-
To update Derpfest, simply download latest Derpfest zip file and in Fastboot Mode, run the command:
fastboot update
**Do not run the fastboot -w command because a wipe is not needed when updating (dirty flashing) from a previous version of Derpfest.
@kadm0s 2022
By using this site you agree to this Privacy Policy. Learn how to clear cookies here
Πάο: Μια εκπαιδευτική λεπτομερής ανάλυση Celtics x Cavaliers: Uma Rivalidade Que Marcou Época palmdale lake homes for sale झारखंड चुनाव परिणाम Jharkhand Election Results ঝাড়খণ্ড ভোটের ফলাফল Northern Ireland Championship 1 Fastboot & ADB (platform-tools) for Windows Opium Warlords Nembutal Dlp Black, 26,99